Some people use their garages for storage, band practice or the start of multimillion-dollar businesses (Hello, Hewlett-Packard). Ben Krasnow conditioned his to function as a workshop where he put together this incredible scanning electron microscope.
People are most familiar with good old optical microscopes which combine light (photons) and lenses to magnify small objects of study. Scanning electron microscopes (SEMs) achieve the very same purpose using a high-energy beam of electrons instead. The one Ben constructed in his garage works just like a professionally-built SEM would.
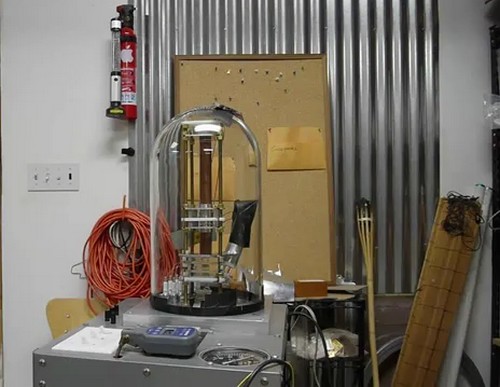
All the action takes place inside a vacuum chamber made up of a glass bell jar sealed onto an aluminum plate. Three brass-threaded rods provide structure. Once the sample meant to be scanned is placed within the chamber, a mechanical pump extracts the air and the physics begin.

It all starts with an electron gun. Ben explains it has a lot in common with electron guns found in cathode ray tube TVs. The gun consists mainly of a tungsten hairpin filament that, when heated up, emits a loose beam of electrons. The beam is accelerated downwards through copper piping, all the way to the bottom of the microscope where the sample is, but it makes two pit stops mid-road.
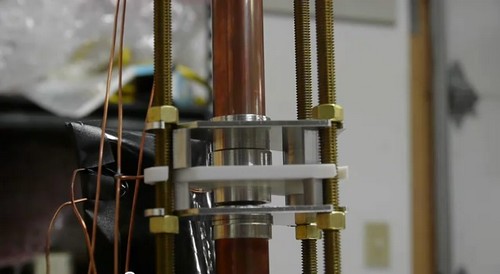
First, it passes through electronic lenses that bring it into tighter focus so that the image produced has increased resolution.
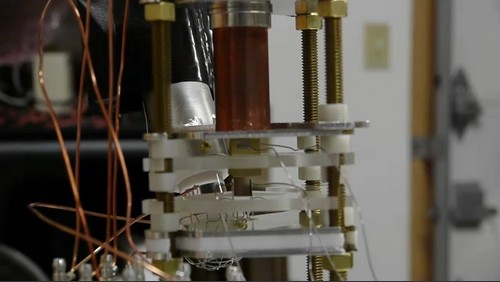
Then, it diverges very sharply onto a set of deflection plates. The voltage across these plates is lower than the voltage in the rest of the system, and this allows control over how the beam moves across the sample.
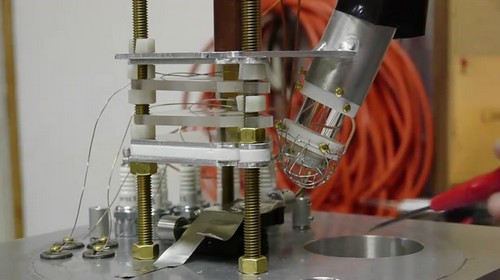
The interaction between the beam and the sample generates “a cloud of secondary electrons”, a signal in other words, promptly captured by an Everhart-Thornley detector placed closed by. The detector has a phosphor screen into which the signal slams, a flash of light ensues and is conducted to a photomultiplier that converts it into an image at last.
Even though the microscope still needs some fine-tuning done so that it comes up with sharper images, it works and that’s no small achievement. Admittedly, most of the components Ben used are not readily available to everyone so this a DIY project only the utmost science geeks will feel fit to tackle. Still, it goes to show there’s virtually no end to the list of things that can be home-built provided some ingenuity. Ben, at least, can now add “high-end scientific instruments” to his.
If you’ve got the DIY bug you should check out The DIY Laser Slingshot, Cool LED Coil Gun DIY Project and DIY Flight Simulator.
Via Hack A Day.


